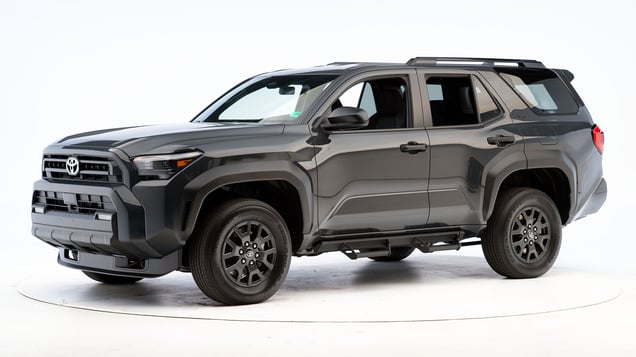
2025 Toyota 4Runner
midsize SUV / 4-door SUV
Small overlap front
The small overlap front evaluation consists of a driver-side and a passenger-side component. This vehicle has an incomplete rating because it has been tested only on one side.
Driver-side
Tested vehicle: 2025 Toyota 4Runner SR5 4-door 4wd
Rating applies to 2025-26 models
The Toyota 4Runner was redesigned for the 2025 model year.
| Evaluation criteria | Rating |
|---|---|
| Overall driver-side evaluation | |
| Structure and safety cage | |
| Driver injury measures | |
| Head/neck | |
| Chest | |
| Hip/thigh | |
| Lower leg/foot | |
| Driver restraints and dummy kinematics | |
Technical measurements for this test
Measures of occupant compartment intrusion on driver side
| Evaluation criteria | Measurement |
|---|---|
| Test ID | CEN2602 |
| Lower occupant compartment | |
| Lower hinge pillar max (cm) | 4 |
| Footrest (cm) | 13 |
| Left toepan (cm) | 10 |
| Brake pedal (cm) | 5 |
| Parking brake (cm) | |
| Rocker panel lateral average (cm) | 4 |
| Upper occupant compartment | |
| Steering column | 0 |
| Upper hinge pillar max (cm) | 2 |
| Upper dash (cm) | 2 |
| Lower instrument panel (cm) | 2 |
Driver injury measures
| Evaluation criteria | Measurement |
|---|---|
| Test ID | CEN2602 |
| Head | |
| HIC-15 | 82 |
| Peak gs at hard contact | no contact |
| Neck | |
| Tension (kN) | 1.1 |
| Extension bending moment (Nm) | 6 |
| Maximum Nij | 0.18 |
| Chest maximum compression (mm) | 23 |
| Femur (kN) | |
| Left | 0.9 |
| Right | 0.6 |
| Knee displacement (mm) | |
| Left | 1 |
| Right | 1 |
| Knee-thigh-hip injury risk (%) | |
| Left | 0 |
| Right | 0 |
| Maximum tibia index | |
| Left | 0.53 |
| Right | 0.59 |
| Tibia axial force (kN) | |
| Left | 2.1 |
| Right | 2.0 |
| Foot acceleration (g) | |
| Left | 75 |
| Right | 72 |
Moderate overlap front: updated test
Tested vehicle: 2025 Toyota 4Runner SR5 4-door 4wd
Rating applies to 2025-26 models
The Toyota 4Runner was redesigned for the 2025 model year.
| Evaluation criteria | Rating |
|---|---|
| Overall evaluation | |
| Structure and safety cage | |
| Driver injury measures | |
| Head/neck | |
| Chest | |
| Thigh/hip | |
| Leg/foot | |
| Driver restraints and dummy kinematics | |
| Rear passenger injury measures | |
| Head/neck | |
| Chest | |
| Thigh | |
|
Rear passenger restraints and dummy kinematics
| |
Technical measurements for this test
Measures of occupant compartment intrusion on driver side
| Evaluation criteria | Measurement |
|---|---|
| Test ID | CEF2539 |
| Footwell intrusion | |
| Footrest (cm) | 14 |
| Left (cm) | 11 |
| Center (cm) | 10 |
| Right (cm) | 7 |
| Brake pedal (cm) | 3 |
| Instrument panel rearward movement | |
| Left (cm) | 1 |
| Right (cm) | 0 |
| Steering column movement | |
| Upward (cm) | 3 |
| Rearward (cm) | -1 |
| A-pillar rearward movement (cm) | 0 |
Driver injury measures
| Evaluation criteria | Measurement |
|---|---|
| Test ID | CEF2539 |
| Head | |
| HIC-15 | 217 |
| Peak gs at hard contact | no contact |
| Neck | |
| Tension (kN) | 1.5 |
| Extension bending moment (Nm) | 8 |
| Maximum Nij | 0.27 |
| Chest maximum compression (mm) | 28 |
| Femur (kN) | |
| Left | 0.8 |
| Right | 1.4 |
| Knee displacement (mm) | |
| Left | 1 |
| Right | 1 |
| Knee-thigh-hip injury risk (%) | |
| Left | 0 |
| Right | 0 |
| Maximum tibia index | |
| Left | 0.34 |
| Right | 0.80 |
| Tibia axial force (kN) | |
| Left | 1.7 |
| Right | 4.5 |
| Foot acceleration (g) | |
| Left | 79 |
| Right | 97 |
Rear passenger injury measures
| Test ID | CEF2539 |
|---|---|
| Head | |
| HIC-15 for head contact during forward excursion | no contact |
| Peak gs at hard contact | no contact |
| Neck | |
| Tension (kN) | 1.5 |
| Compression (kN) | 0.6 |
| Maximum Nij for head contact during forward excursion | no contact |
| Chest | |
| Chest index | 31 |
| Shoulder belt tension (kN) | 4.5 |
| Thigh (kN) | |
| Left femur compression | 0.1 |
| Right femur compression | 0.1 |
Side: updated test
Tested vehicle: 2025 Toyota 4Runner SR5 4-door 4wd
Rating applies to 2025-26 models
The Toyota 4Runner was redesigned for the 2025 model year.
| Evaluation criteria | Rating |
|---|---|
| Overall evaluation | |
| Structure and safety cage | |
| Driver injury measures | |
| Head/neck | |
| Torso | |
| Pelvis | |
| Driver head protection | |
| Rear passenger injury measures | |
| Head/neck | |
| Torso | |
| Pelvis | |
| Rear passenger head protection | |
Technical measurements for this test
Measures of occupant compartment intrusion on driver side
| Evaluation criteria | Measurement |
|---|---|
| Test ID | CES2503 |
| B-pillar to longitudinal centerline of driver's seat (cm) | -23.0 |
| Negative numbers indicate the amount by which the crush stopped short of the seat centerline. | |
Driver injury measures
| Evaluation criteria | Measurement |
|---|---|
| Test ID | CES2503 |
| Head | |
| HIC-15 | 30 |
| Peak gs at hard contact | no contact |
| Neck | |
| Tension (kN) | 0.4 |
| Compression (kN) | 0.2 |
| Shoulder | |
| Lateral deflection (mm) | 11 |
| Lateral force (kN) | 0.8 |
| Torso | |
| Maximum deflection (mm) | 20 |
| Average deflection (mm) | 15 |
| Maximum deflection rate (m/s) | 2.12 |
| Maximum viscous criterion (m/s) | 0.15 |
| Pelvis | |
| Combined force (kN) | 2.0 |
Passenger injury measures
| Evaluation criteria | Measurement |
|---|---|
| Test ID | CES2503 |
| Head | |
| HIC-15 | 51 |
| Peak gs at hard contact | no contact |
| Neck | |
| Tension (kN) | 0.3 |
| Compression (kN) | 0.5 |
| Shoulder | |
| Lateral deflection (mm) | 17 |
| Lateral force (kN) | 1.4 |
| Torso | |
| Maximum deflection (mm) | 24 |
| Average deflection (mm) | 11 |
| Maximum deflection rate (m/s) | 1.92 |
| Maximum viscous criterion (m/s) | 0.26 |
| Pelvis | |
| Combined force (kN) | 1.9 |
Headlights
Ratings are given for 2 different headlight variations available on this vehicle.
(1) Trim level(s): Limited trim, Platinum trim, TRD Pro trim, TrailHunter trim
| Evaluation criteria | Rating |
|---|---|
| Low-beam headlight type | LED projector |
| High-beam headlight type | LED projector |
| Curve-adaptive? | No |
| High-beam assist? | Yes |
|
Overall rating | |
| Distance at which headlights provide at least 5 lux illumination: | |
Low beams
On the straightaway, visibility was good on both sides of the road. On curves, visibility was good on the gradual left and gradual right curves and fair on the sharp left and sharp right curves.
The low beams created some glare.
High beams
On the straightaway, visibility was good on the right side of the road and fair on the left side. On curves, visibility was good on the gradual left and gradual right curves and fair on the sharp left and sharp right curves.
High-beam assist compensates for some limitations of this vehicle's low beams on the sharp left curve and on the sharp right curve.
Technical measurements for this test
| Evaluation criteria | Measurement |
|---|---|
| Trim level(s) |
|
| Low-beam headlight type | LED projector |
| High-beam headlight type | LED projector |
| Curve-adaptive? | No |
| High-beam assist? | Yes |
|
Overall rating Applies to 2025-26 models |
| LOW BEAMS | Average minimum useful illumination distance (5 lux) |
Amount glare exceeded threshold |
|---|---|---|
| Straightaway right edge | 112.5 m | None |
| Straightaway left edge | 63.4 m | None |
| 250m radius right curve, right edge | 73.6 m | 12.3% |
| 250m radius left curve, left edge | 73.2 m | 115.9% |
| 150m radius right curve, right edge | 52.3 m | 46.0% |
| 150m radius left curve, left edge | 54.8 m | 87.1% |
| HIGH BEAMS | Average minimum useful illumination distance (5 lux) |
|---|---|
| Straightaway right edge | 168.0 m |
| Straightaway left edge | 137.7 m |
| 250m radius right curve, right edge | 80.2 m |
| 250m radius left curve, left edge | 81.1 m |
| 150m radius right curve, right edge | 57.7 m |
| 150m radius left curve, left edge | 62.4 m |
(2) Trim level(s): SR5 trim, TRD Sport trim, TRD Sport Premium trim, TRD Off-Road trim, TRD Off-Road i-FORCE MAX trim, TRD Off-Road Premium trim, TRD Off-Road Premium i-FORCE MAX trim
| Evaluation criteria | Rating |
|---|---|
| Low-beam headlight type | LED projector |
| High-beam headlight type | LED projector |
| Curve-adaptive? | No |
| High-beam assist? | Yes |
|
Overall rating | |
| Distance at which headlights provide at least 5 lux illumination: | |
Low beams
On the straightaway, visibility was good on both sides of the road. On curves, visibility was good in all 4 tests.
The low beams created excessive glare.
High beams
On the straightaway, visibility was fair on both sides of the road. On curves, visibility was fair in all 4 tests.
High-beam assist compensates for some limitations of this vehicle's low beams on the gradual left curve and on the gradual right curve.
Technical measurements for this test
| Evaluation criteria | Measurement |
|---|---|
| Trim level(s) |
|
| Low-beam headlight type | LED projector |
| High-beam headlight type | LED projector |
| Curve-adaptive? | No |
| High-beam assist? | Yes |
|
Overall rating Applies to 2025-26 models |
| LOW BEAMS | Average minimum useful illumination distance (5 lux) |
Amount glare exceeded threshold |
|---|---|---|
| Straightaway right edge | 110.8 m | None |
| Straightaway left edge | 72.6 m | None |
| 250m radius right curve, right edge | 68.1 m | 159.8% |
| 250m radius left curve, left edge | 68.0 m | 61.7% |
| 150m radius right curve, right edge | 58.1 m | 211.5% |
| 150m radius left curve, left edge | 60.6 m | 21.4% |
| HIGH BEAMS | Average minimum useful illumination distance (5 lux) |
|---|---|
| Straightaway right edge | 138.0 m |
| Straightaway left edge | 136.6 m |
| 250m radius right curve, right edge | 68.4 m |
| 250m radius left curve, left edge | 70.4 m |
| 150m radius right curve, right edge | 57.4 m |
| 150m radius left curve, left edge | 60.6 m |
Front crash prevention: vehicle-to-vehicle 2.0
Front crash prevention: pedestrian
Seat belt reminders
Rating applies to 2025-26 models
| Evaluation criteria | Rating |
|---|---|
| Overall evaluation | |
| Front row | |
| Unbelted occupant alert (audible & visual) | |
| Initiation time | |
| Duration | Long enough (90+ seconds) |
| Volume | |
| Audio frequency | |
| Second row | |
| Startup status alert (visual) | |
| Initiation time | |
| Duration at least 60 seconds | |
| Belt disengaged alert (audible & visual) | |
| Initiation time | |
| Duration at least 30 seconds | |
| Volume | |
| Audio frequency | |
Technical measurements for this test
| Evaluation criteria | Measurement |
|---|---|
| Background cabin sound pressure level at 24 km/h | 50 dB |
| Audible signal sound pressure level at 24 km/h | 65 dB |
| Difference between background and signal | 15.2 dB |
| Background cabin sound pressure level at 40 km/h | 54 dB |
| Audible signal sound pressure level at 40 km/h | 66 dB |
| Difference between background and signal | 12.9 dB |
| Dominant audio frequency | 1820 Hz |
Child seat anchors
Rating applies to 2025-26 models
| Evaluation criteria | Rating |
|---|---|
| Overall evaluation | + extra LATCH positions |
| Vehicle trim | SR5 |
| Seat type | cloth |
This vehicle has 2 rear seating positions with complete child seat attachment (LATCH) hardware. It has 1 additional seating position with a tether anchor and the ability to borrow lower anchors from the other seating positions. Note: When anchors are borrowed, they aren't available to use in their designated positions.
| Rating icon | Rating |
|---|---|
| G | Good |
| A | Acceptable |
| M | Marginal |
| P | Poor |
| Seating positions that rely on borrowed lower anchors or have only a tether anchor available are not rated. | |
thether anchor symbol | Tether anchor |
lower anchor symbol | Lower anchors |
| Lower anchor(s) can be borrowed from adjacent positions(s) | |
| No hardware available |
Details by seating position
| Position | Rating |
|---|---|
| 1 | |
| Tether anchor | |
| easy-to-find location | |
| no other hardware could be confused for anchor | |
| Lower anchors | |
| not too deep in seat | |
| not too much force needed to attach | |
| easy to maneuver around anchors | |
| 2 | |
| Tether anchor | |
| easy-to-find location | |
| no other hardware could be confused for anchor | |
| Lower anchors | |
| Can be borrowed from 1 and 3 | |
| 3 | |
| Tether anchor | |
| easy-to-find location | |
| no other hardware could be confused for anchor | |
| Lower anchors | |
| not too deep in seat | |
| not too much force needed to attach | |
| easy to maneuver around anchors |
Technical measurements for this test
Seat position 21
| Lower anchor A | |
|---|---|
| Open access rated | Yes |
| Depth | Visible |
| Force (lbs) | 0 |
| Clearance angle (degrees) | 76 |
| Lower anchor B | |
| Open access rated | Yes |
| Depth | Visible |
| Force (lbs) | 0 |
| Clearance angle (degrees) | 86 |
| Tether anchor | |
| Location | Middle seatback |
| Confusing hardware present | Yes |
| Has contrasting label within 3 inches of tether anchor |
Yes |
| Tether anchors can be accessed while seatback is properly positioned for use of LATCH |
Yes |
Seat position 22
| Lower anchor A | |
|---|---|
| Lower latch is shared for this seat position | |
| Lower anchor B | |
| Lower latch is shared for this seat position | |
| Tether anchor | |
| Location | Middle seatback |
| Confusing hardware present | Yes |
| Has contrasting label within 3 inches of tether anchor |
Yes |
| Tether anchors can be accessed while seatback is properly positioned for use of LATCH |
Yes |
Seat position 23
| Lower anchor A | |
|---|---|
| Open access rated | Yes |
| Depth | Visible |
| Force (lbs) | 1 |
| Clearance angle (degrees) | 84 |
| Lower anchor B | |
| Open access rated | Yes |
| Depth | Visible |
| Force (lbs) | 1 |
| Clearance angle (degrees) | 76 |
| Tether anchor | |
| Location | Middle seatback |
| Confusing hardware present | Yes |
| Has contrasting label within 3 inches of tether anchor |
Yes |
| Tether anchors can be accessed while seatback is properly positioned for use of LATCH |
Yes |